
Managing your business finances can feel overwhelming, but modern accounting software simplifies the process. Xero, a powerful cloud-based accounting platform, is designed to help small and medium-sized businesses streamline their financial management, from invoicing to bank reconciliation.
This comprehensive guide will walk you through everything you need to know. We will cover the essential steps to get your account running, manage daily tasks, and use its features effectively. By following this guide on how to use Xero accounting software, you can take control of your accounting with confidence.
Getting Started With Xero
Beginning your journey with Xero is a straightforward process designed to get you up and running quickly. The first step is to visit the Xero website and choose a subscription plan that aligns with your business needs. Xero offers several tiers, each providing different levels of functionality, from basic plans for sole traders to more advanced options for growing companies.
Once you select a plan, you will proceed to create an account by providing your email address and a secure password. After activating your account through a confirmation email, you are ready to begin the setup process and tailor the software to your specific business requirements.
Setting Up Your Organization
Properly setting up your organization’s details is a critical first step. This information forms the foundation of your financial records, invoices, and reports. After your initial login, Xero will prompt you to enter these details. You will need to provide your official business name, address, and contact information. This ensures all documents generated by Xero, such as invoices and purchase orders, are accurate and professional.
Next, you will configure your financial settings. This includes selecting your country, which determines the correct currency and tax settings. You will also need to input your business’s tax ID number. A crucial part of this stage is establishing your financial year-end date, which is essential for accurate annual reporting. Take your time to ensure all this information is correct, as it directly impacts the integrity of your financial data within the platform.
6 Simple Step-By-Step Guidelines on How to Use Xero Accounting Software
Step 1: Customize Your Chart of Accounts
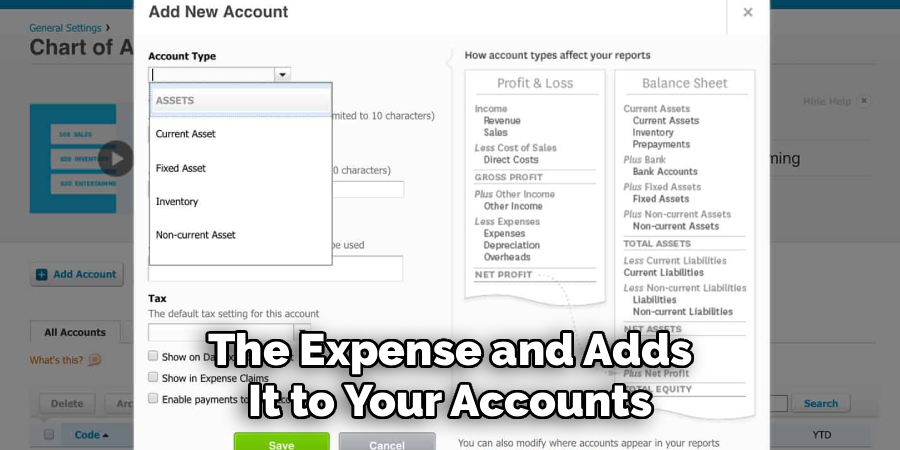
Your Chart of Accounts is the backbone of your accounting system, acting as a categorized list of all your financial accounts. Xero provides a default list, but customizing it to match your business operations is essential for accurate tracking and reporting. Start by reviewing the existing accounts. You can edit their names or numbers to better reflect your terminology. For instance, you might change a generic “Sales” account to more specific ones like “Product Sales” and “Service Revenue” to gain deeper insights into your income streams.
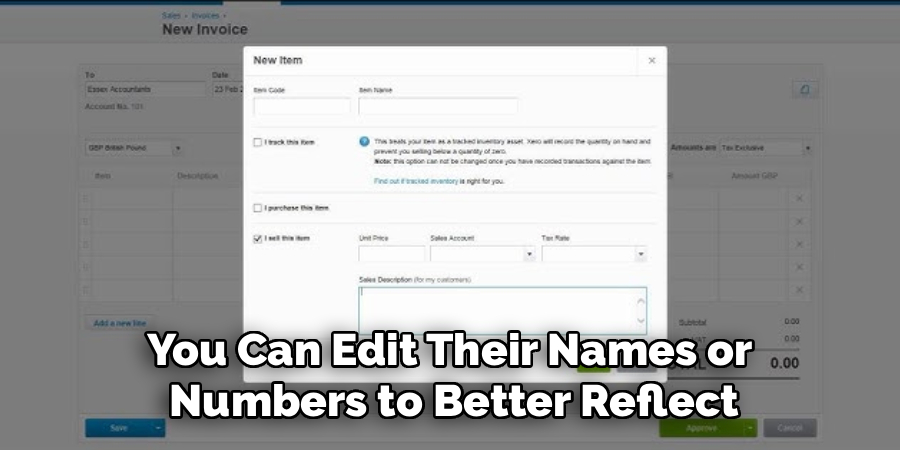
Don’t hesitate to add new accounts that are unique to your business, such as specific expense categories like “Software Subscriptions” or “Marketing Expenses.” Conversely, you can archive any default accounts that are irrelevant to your operations to keep your list clean and manageable. A well-organized Chart of Accounts makes it easier to classify transactions correctly, which in turn leads to more precise financial statements and a clearer understanding of your company’s financial health.
Step 2: Connect Your Bank Accounts
One of Xero’s most powerful features is its ability to connect directly to your business bank accounts through live bank feeds. This integration automates the process of importing your transaction data, saving you hours of manual entry and reducing the risk of errors. To set this up, navigate to the “Accounting” menu and select “Bank Accounts.” From there, you can search for your bank and follow the secure, step-by-step instructions to link your accounts. You will need your online banking credentials to authorize the connection.
Once connected, your bank transactions will automatically appear in your Xero dashboard each business day. This real-time visibility allows you to monitor your cash flow closely. The next task is to reconcile these imported transactions by matching them to invoices, bills, or by creating new transaction entries. This daily or weekly reconciliation habit is key to maintaining accurate and up-to-date financial records, ensuring you always have a clear picture of your cash position.
Step 3: Set Up Invoicing and Branding
Professional-looking invoices are crucial for maintaining a strong brand identity and encouraging prompt payments. Xero allows you to create and customize invoice templates that reflect your brand. Go to the “Settings” menu, select “Invoice Settings,” and start a new branding theme. Here, you can upload your company logo, choose fonts, and adjust the layout to create a polished and professional document. You can also edit the default text for emails sent with your invoices.

Beyond aesthetics, it is important to set up your payment terms. Define your standard due dates, such as 14 or 30 days from the invoice date, and include any information about late payment fees. You should also integrate online payment gateways like Stripe or PayPal. Connecting these services adds a “Pay Now” button to your digital invoices, making it incredibly easy for your clients to pay you online, which can significantly improve your cash flow and reduce overdue payments.
Step 4: Add Your Customers and Suppliers
Building a database of your customers and suppliers within Xero is essential for efficient operations. Having this information readily available simplifies the creation of invoices and bills. To start, go to the “Contacts” section and choose to add a new contact. You can enter their details manually, including name, email, phone number, and address. For larger lists, Xero offers a convenient option to import contacts in bulk using a CSV template, saving you significant time.
When adding contacts, you can also set default information that will auto-populate on future transactions. For customers, you can assign a default sales account and tax rate. For suppliers, you can set default expense accounts and due dates. This level of detail not only speeds up your day-to-day workflow but also ensures consistency in your accounting records. A well-maintained contact list is a valuable asset that streamlines your entire invoicing and payment process.
Step 5: Manage Bills and Expenses
Effectively tracking what you owe is just as important as tracking what you are owed. Xero simplifies bill management by providing a central place to record and monitor your payables. You can enter bills manually by navigating to “Business” and then “Bills to pay.” Input the supplier’s details, the due date, item descriptions, and amounts. This creates a clear record of the expense and adds it to your accounts payable, giving you an accurate view of your upcoming financial obligations.
For even greater efficiency, use Xero’s email-to-bills feature, which gives you a unique email address to forward supplier invoices to directly. Xero can then use optical character recognition (OCR) technology to automatically extract the key data and create a draft bill for your review. You can also use the Xero mobile app to snap photos of receipts on the go. This ensures that you capture all expenses accurately and can claim every eligible deduction, all while keeping your financial records organized and up-to-date.
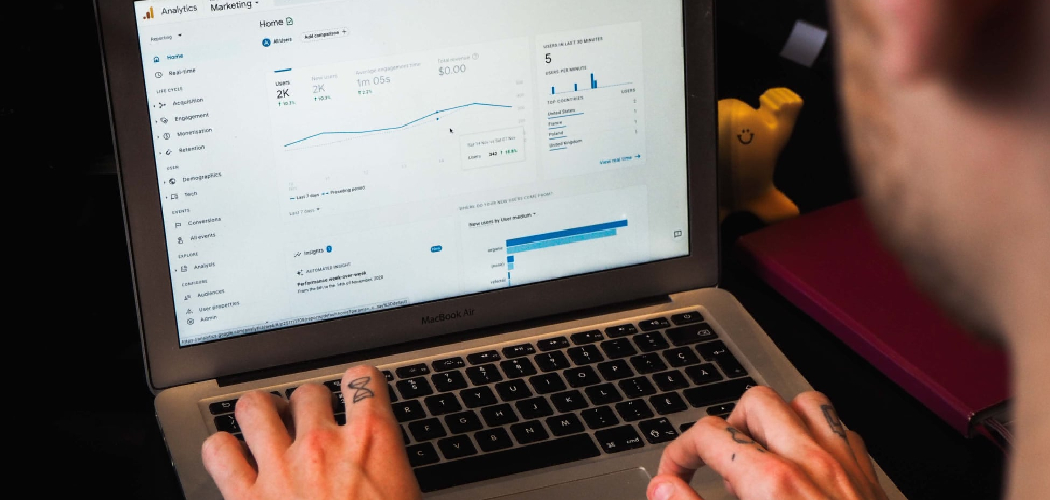
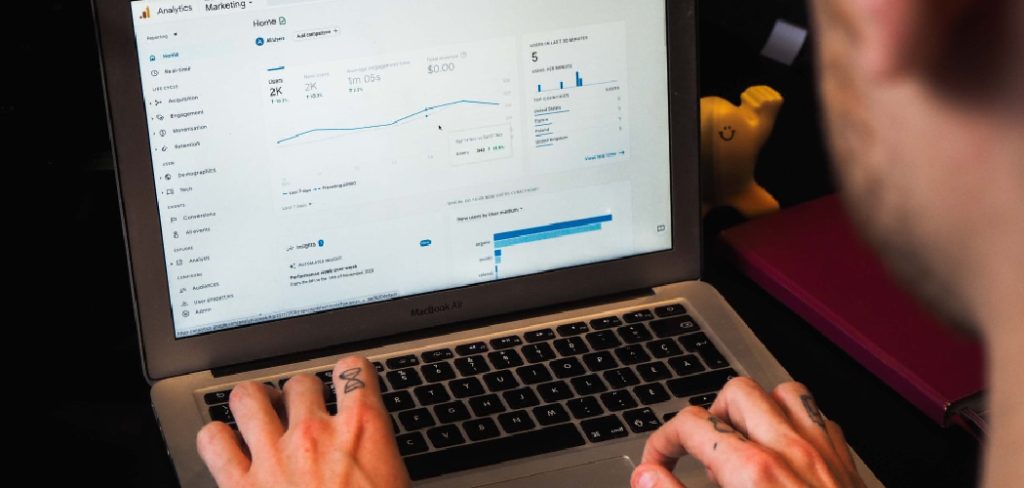
Step 6: Run and Understand Financial Reports
The ultimate goal of diligent bookkeeping is to generate insightful financial reports that inform your business decisions. Xero offers a wide range of customizable reports that provide a clear view of your financial performance. The most critical reports include the Profit and Loss (P&L) statement, which shows your revenue, expenses, and net profit over a specific period, and the Balance Sheet, which gives a snapshot of your assets, liabilities, and equity at a single point in time.
Take time to explore the reporting section, accessible from the “Accounting” menu. You can run these reports for any date range and compare periods to track trends. Other valuable reports include the Aged Payables and Aged Receivables reports, which help you manage cash flow by showing who owes you money and who you need to pay. Regularly reviewing these reports will empower you to make strategic, data-driven decisions to guide your business toward growth and profitability.
Following these steps on how to use Xero accounting software can greatly improve the financial management of your business. However, there are also other features and tools that Xero offers to further enhance your accounting processes.
Safety Tips
Protecting your financial data is paramount. Always enable two-step authentication (2SA) on your Xero account. This adds an extra layer of security by requiring a code from your phone in addition to your password. Be cautious of phishing emails that pretend to be from Xero; never click on suspicious links or provide your login details.
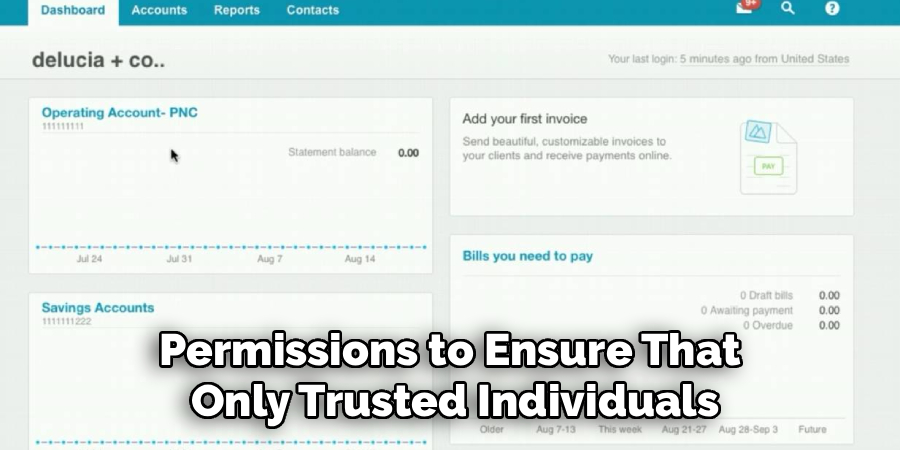
Regularly review user permissions to ensure that only trusted individuals have access to sensitive information. It is also wise to use a strong, unique password for your Xero account and to change it periodically.
Tips for Beginners
If you are new to Xero, start by exploring the demo company. This is a pre-populated, risk-free environment where you can practice entering transactions and running reports without affecting your actual data. Take advantage of Xero Central, the official online support hub, which is filled with articles, guides, and video tutorials.
Do not try to learn everything at once. Focus on mastering one area at a time, such as invoicing or bank reconciliation, before moving on to the next. Finally, consider consulting with a Xero-certified accountant or bookkeeper who can help you with the initial setup and provide ongoing support.
Frequently Asked Questions
Q1: Can I Use Xero If I Am Not an Accountant?
A1: Absolutely. Xero is specifically designed with business owners in mind, not just accountants. Its interface is intuitive and user-friendly, simplifying complex accounting tasks into manageable workflows. Features like automated bank feeds, simple invoicing templates, and an easy-to-read dashboard make it accessible for those without a financial background. The platform also provides extensive support resources to guide you through any challenges.
Q2: Is My Financial Data Secure in the Cloud?
A2: Yes, Xero prioritizes data security with multiple layers of protection. Your information is stored on secure servers with robust physical and network security measures. All data transmitted between you and Xero is encrypted, similar to the security used for online banking. By enabling two-step authentication and practicing good password hygiene, you can be confident that your sensitive financial information is well-protected.
Q3: How Does Xero Handle Different Currencies?
A3: Xero offers robust multi-currency functionality on its more advanced subscription plans. This feature is ideal for businesses that trade internationally. You can send invoices, receive payments, and create purchase orders in over 160 different currencies. Xero automatically handles the exchange rate conversions and updates them hourly, providing an accurate calculation of your realized and unrealized gains or losses, which simplifies international financial management.
Conclusion
Xero accounting software is a versatile and user-friendly tool that can transform how you manage your business finances. By following the steps outlined in this guide on how to use Xero accounting software—from setting up your organization and connecting your bank feeds to managing invoices and running reports—you can establish a solid financial management system.
This system will not only save you time but also provide the clarity needed to make informed business decisions. Embracing Xero empowers you to take control of your accounting, improve your cash flow, and focus on what you do best: growing your business.
About
Josh Stone is a distinguished figure in the world of software engineering and digital architecture, with a decade of expertise creating innovative and scalable software solutions. His professional focus lies in merging legacy system stability with modern agile development, fostering applications that are both high-performing and user-centric. As an authoritative voice in the tech space, Josh Stone delves into the art and science of clean code and systems design, inspiring developers and industry leaders alike.
Education
RMIT University (Melbourne, Australia) Associate Degree in Software Development Focus on sustainable codebases, industry-driven projects, and practical programming. Gained hands-on experience with full-stack frameworks, database management, and cloud infrastructure.
Nottingham Trent University (United Kingdom) Bachelor’s in Computer Science and Systems Design (Honors) Specialized in software architecture with a focus on blending creative UI/UX with robust backend production techniques. Participated in high-level industry projects, collaborating with global tech firms to gain real-world insights into enterprise-level deployment.
Publications and Impact
In his technical writings, Josh Stone shares his insights on agile design processes, emerging languages, and strategies for efficient DevOps. His work bridges the gap between theoretical computer science and modern industry needs, making it a must-read for both budding programmers and seasoned software architects.