

Keeping your software up to date is crucial for both security and performance, and the popular VLC media player is no exception. As a versatile, open-source application capable of playing nearly any media file, VLC regularly receives updates that introduce new features, improve compatibility with modern codecs, and patch potential security vulnerabilities. These updates ensure you have the best possible viewing experience.
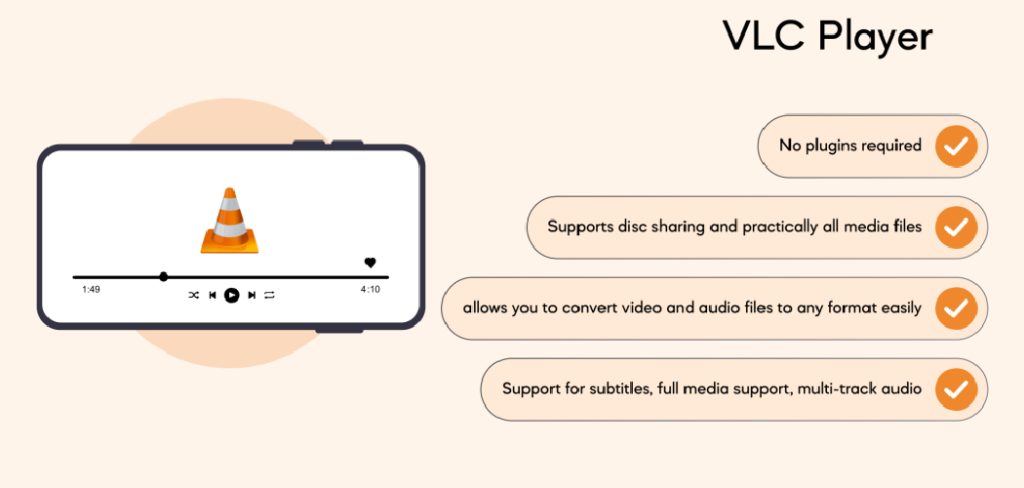
Neglecting these updates can leave your system exposed to security risks and result in playback issues with newer video formats. Following a structured update process guarantees that you can continue enjoying your media files seamlessly and securely. This guide on how to update VLC provides a detailed walkthrough to help you update your VLC media player without any hitches, ensuring it runs optimally.
Key
Following the step-by-step guidelines in this article is significant for ensuring a smooth and error-free update process. Each step is designed to guide you through the procedure logically, from checking for a new version to verifying the installation.
By adhering to these instructions, you minimize the risk of common issues like incomplete installations, loss of settings, or downloading from untrustworthy sources. This systematic approach ensures that your media player is correctly updated, preserving its functionality while integrating the latest enhancements and security fixes.
9 Step-by-step Guidelines on How to Update VLC
Step 1: Launch the VLC Media Player Application
The initial action required to begin the update process is to open the VLC media player on your computer. You can typically find the application icon on your desktop, in the Start Menu on Windows, or within the Applications folder on macOS. Double-clicking the icon will launch the program, bringing up the main player interface. This step is fundamental because the update function is managed from within the application itself, providing a secure and direct method to access official updates from the VideoLAN organization.
It is important to ensure you are running the application with the necessary permissions, especially on corporate or shared computers where administrative rights might be restricted. If you encounter any issues opening the program, try right-clicking the icon and selecting “Run as administrator” on Windows. Having the application open and fully loaded is the starting point for accessing the built-in update checker, which will communicate with the official VLC servers to determine if a newer version is available for your system.

Step 2: Navigate to the “Help” Menu
Once the VLC media player is open and running, direct your attention to the menu bar located at the very top of the application window. This bar contains several options such as “Media,” “Playback,” “Audio,” “Video,” and “Tools.” Among these, you will find a menu item labeled “Help.” Click on this “Help” menu to reveal a dropdown list of options. This menu is the gateway to various support-related functions, including access to documentation, bug reporting, and, most importantly for this task, the update checker.
The design of VLC’s user interface is intentionally straightforward, making essential functions like this easy to locate for users of all experience levels. The “Help” menu is the standard location for update checkers in many software applications, and VLC follows this conventional design. Accessing this menu is a critical step that moves you forward in the process, allowing you to initiate the check for a new version directly from the software you are currently using, which is the safest method.
Step 3: Select “Check for Updates…”
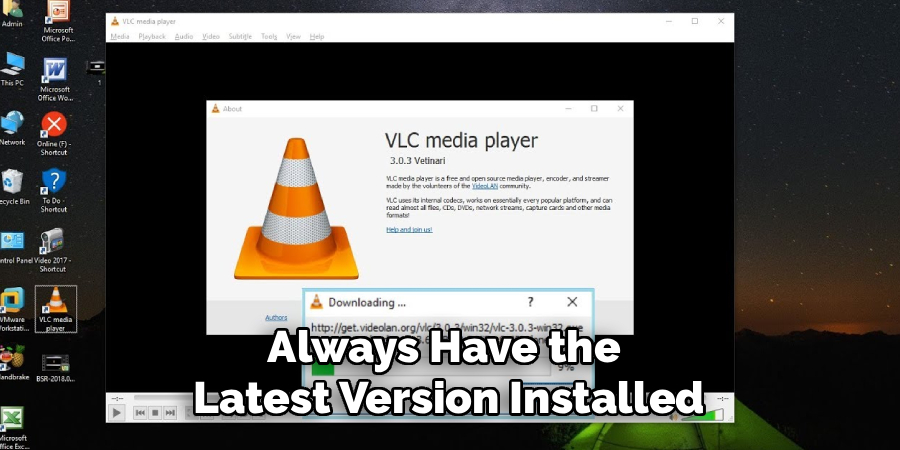
After clicking on the “Help” menu, a drop-down list will appear with several choices. From this list, you need to locate and click on the option labeled “Check for Updates…”. This action will trigger VLC’s built-in update mechanism. The software will then connect to the official VideoLAN servers over the internet to query whether a newer, stable version of the media player has been released since the one you are currently running was installed. This process is usually very quick, often taking just a few seconds.
Upon selecting this option, a small pop-up window will typically appear on your screen to display the results of the check. If you are already running the latest version, the window will inform you that “You have the latest version of VLC media player.” If a new version is available, the window will provide details about the new release, such as the version number. It will also present you with options to proceed with the download and installation, making it the central point of action for the entire update process.
Step 4: Initiate the Download of the New Version
If the update check confirms that a new version of VLC is available, the pop-up window will display a message like “A new version of VLC (x.x.x) is available. Do you want to download it now?” You will be presented with “Yes” and “No” buttons. To proceed with the update, you must click the “Yes” button. This action will initiate the download process for the new installer file directly from the official VideoLAN servers, ensuring the file is authentic and free from malware.
A new window will appear showing the progress of the download. You can monitor the download’s status as the file is saved to a temporary location on your computer. The size of the update file is typically modest, so the download should not take long on a standard internet connection. It is important to let this download complete without interruption. Avoid closing the progress window or shutting down your computer, as doing so will cancel the download and require you to start the process over again.
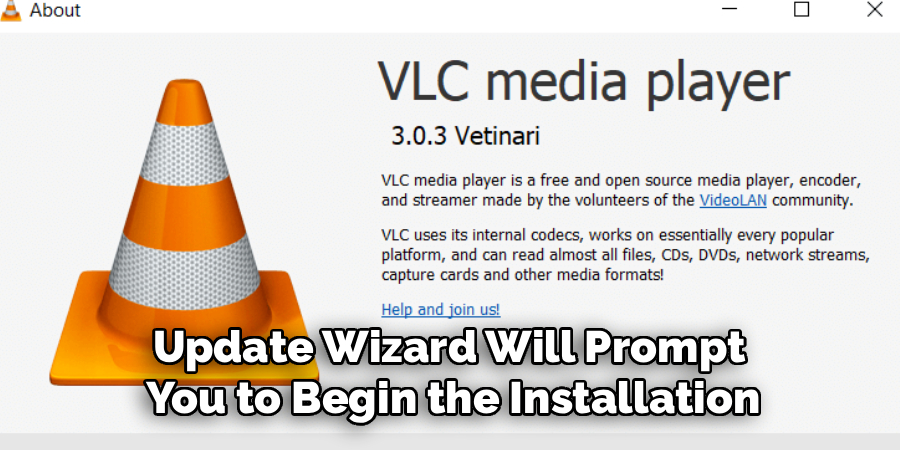
Step 5: Close VLC to Start the Installation
Once the download of the new installer file is complete, the update wizard will prompt you to begin the installation. An important prerequisite for this is to close the currently running VLC media player application. The installer cannot modify or replace core application files while they are in use by the operating system. The update wizard will usually display a message asking you to “Close VLC to continue with the installation.” You will be given a button to click that automatically closes the player.
If, for some reason, the automated process does not close VLC, you will need to do so manually. You can close the main VLC window by clicking the ‘X’ button in the top corner. In some cases, VLC may still be running as a background process. If the installer continues to report that VLC is open, you may need to use the Task Manager (Ctrl+Shift+Esc on Windows) or Activity Monitor (on macOS) to find and end the vlc.exe process manually. Ensuring VLC is fully closed is crucial for a successful installation.
Step 6: Follow the Installation Wizard Prompts
With VLC closed, the installation wizard for the new version will launch automatically. This wizard will guide you through the remaining steps of the update. You will be presented with a series of screens that require your input. The first screen is typically a welcome message, followed by the license agreement. Read through the agreement and click the appropriate button to accept and continue. The wizard is designed to make the process as simple as possible for the user.
Next, you will be asked to choose the type of installation. For a standard update, it is highly recommended to select the “Upgrade VLC using previous settings (recommended)” option. This choice ensures that all your personalized settings, preferences, interface customizations, and playlist history are preserved and carried over to the new version. Choosing a “Clean” or “Custom” installation might reset these settings to their default state, so the recommended option is best for a seamless transition.
Step 7: Select Components and Installation Location
After choosing the upgrade option, the installer will ask you to confirm the components to be installed. For most users, the default selection is perfectly adequate, as it includes all the necessary codecs, plugins, and features for a comprehensive media playback experience. Unless you have a specific reason to add or remove certain components, it is best to leave these settings as they are and proceed by clicking “Next.” This ensures that you don’t accidentally omit a crucial part of the software.
The next screen will prompt you to choose the destination folder for the installation. The wizard will automatically detect the location where your current version of VLC is installed and default to that same directory. It is essential to keep this destination unchanged. Installing the new version in the same folder allows the installer to correctly overwrite the old files with the new ones, completing the update. Changing the location could result in having two separate installations of VLC, which can cause conflicts. Click “Install” to begin copying the new files.
Step 8: Complete the Installation Process
Once you click the “Install” button, the wizard will begin the final phase of the update. It will extract the new files and copy them to the designated installation folder, replacing the old application files. A progress bar will be displayed, allowing you to monitor the installation as it happens. This part of the process is usually the quickest, often finishing in less than a minute. It is important to wait for this process to complete without any interruptions.
When the installation is finished, you will see a final screen confirming that VLC has been successfully updated. This screen might include an option to “Run VLC media player” and to view the release notes. It is a good idea to leave the “Run VLC” box checked so you can immediately launch the newly updated application and verify that everything is working as expected. Click the “Finish” button to close the installation wizard and complete the update process.
Step 9: Verify the New Version
The final step is to confirm that the update was successful and that you are now running the latest version of VLC. If you opted to run VLC from the final installer screen, the application will open automatically. If not, launch it from your desktop or Start Menu. Once VLC is open, navigate back to the menu bar at the top, click on the “Help” menu, and this time, select the “About” option from the dropdown list.
A window will appear displaying detailed information about the VLC installation. The most important piece of information here is the version number, which will be prominently displayed at the top. Compare this version number to the one that the update checker initially told you was available. If they match, your update was successful. You can now close the “About” window and begin using your newly updated, more secure, and feature-rich VLC media player.
Following these steps on how to update VLC media player ensures that you always have the latest version installed on your computer. This is important because updates often include bug fixes, security patches, and new features that can enhance your overall experience with the media player.
Common Mistakes to Avoid
When updating VLC, avoid downloading the installer from third-party websites, as these can contain malware; always use the official in-app updater or the VideoLAN website.
Do not skip the step of closing VLC before installing, as this can lead to a failed or corrupt installation. Avoid choosing a “clean install” unless you want to lose all your custom settings and preferences. Also, be careful not to change the installation directory, which can create duplicate, conflicting versions on your system.
How Much Time Will It Take?
The entire process of updating VLC is quite fast and typically takes no more than five to ten minutes to complete. The most time-consuming part is usually the download of the new installer file, which depends entirely on the speed of your internet connection. On a fast broadband connection, the download may only take a minute or two.
The installation itself is very quick, usually finishing in under a minute. Factoring in the time to navigate the menus and click through the installer prompts, the whole procedure is a very brief and worthwhile investment for keeping your media player in top shape.
Frequently Asked Questions
Q1: Will Updating VLC Delete My Playlists and Settings?
A1: No, updating VLC will not delete your playlists or settings, provided you choose the correct option during the installation process. The update wizard will offer an option to “Upgrade VLC using previous settings,” which is the recommended choice. Selecting this ensures that all your configurations, interface adjustments, audio and video preferences, and saved playlists are automatically carried over to the new version, providing a seamless transition.
Q2: What Should I Do If the Update Fails?
A2: If the update process fails, the first step is to try again, ensuring that VLC is completely closed before you run the installer. If it continues to fail, the best solution is to perform a manual update. Go to the official VideoLAN website, download the latest installer for your operating system, and run it. If problems persist, you may need to uninstall your current version of VLC completely and then perform a fresh installation with the new installer.
Q3: Is It Safe to Update VLC Media Player?
A3: Yes, it is completely safe to update VLC, and it is highly recommended. The updates are released by the VideoLAN organization, a reputable non-profit. These updates often contain important security patches that protect your computer from vulnerabilities, as well as bug fixes and new features. To ensure safety, always use the built-in “Check for Updates…” feature or download the installer directly from the official videolan.org website.
Conclusion
Regularly updating your VLC media player is a simple yet essential task for maintaining optimal performance and security. The new versions released by the VideoLAN team bring valuable improvements, from support for the latest media codecs to critical patches that protect your system.
By following the nine steps detailed in this guide on how to update VLC, you can ensure a smooth, quick, and error-free update. Taking a few minutes to complete this process allows you to continue enjoying a superior and secure media playback experience with one of the world’s most popular players.
About
Josh Stone is a distinguished figure in the world of software engineering and digital architecture, with a decade of expertise creating innovative and scalable software solutions. His professional focus lies in merging legacy system stability with modern agile development, fostering applications that are both high-performing and user-centric. As an authoritative voice in the tech space, Josh Stone delves into the art and science of clean code and systems design, inspiring developers and industry leaders alike.
Education
RMIT University (Melbourne, Australia) Associate Degree in Software Development Focus on sustainable codebases, industry-driven projects, and practical programming. Gained hands-on experience with full-stack frameworks, database management, and cloud infrastructure.
Nottingham Trent University (United Kingdom) Bachelor’s in Computer Science and Systems Design (Honors) Specialized in software architecture with a focus on blending creative UI/UX with robust backend production techniques. Participated in high-level industry projects, collaborating with global tech firms to gain real-world insights into enterprise-level deployment.
Publications and Impact
In his technical writings, Josh Stone shares his insights on agile design processes, emerging languages, and strategies for efficient DevOps. His work bridges the gap between theoretical computer science and modern industry needs, making it a must-read for both budding programmers and seasoned software architects.