
Installing a new operating system might seem like a complex task, but with the right guidance, it can be a smooth and rewarding experience. Linux, a powerful and versatile open-source operating system, offers a fantastic alternative to more common platforms. It’s known for its security, stability, and extensive customization options, making it a favorite among developers, tech enthusiasts, and users seeking more control over their computing environment.

This guide on how to install linux operating system is designed for beginners who are curious about making the switch. We will walk you through every stage of the process, from gathering your materials to the final installation steps. By following these instructions, you can unlock the potential of Linux on your computer, whether you’re reviving an old machine or looking for a fresh start on a new one.
Tools and Materials You’ll Need
Before getting started, make sure you have the necessary tools and materials to successfully install Linux on your computer.
1. USB Drive or DVD-RW:
You will need a USB drive or DVD-RW with a minimum capacity of 4GB to store your chosen Linux distribution (more on that later). If using a USB drive, make sure it is bootable and empty before proceeding.
2. Blank CD or DVD:
If you choose to use a live CD image instead of a USB drive, you will need a blank CD or DVD to burn the image onto.
3. A Computer with Internet Access:
In order to download the necessary files and follow along with this guide, you will need a computer with internet access. This can be your main computer or a separate one that you plan on installing Linux on.

4. Backup Your Data:
Before proceeding with the installation, it is highly recommended to back up all important data from your computer. While the installation process should not delete any of your files, accidents can happen and it’s always better to be safe than sorry.
6 Simple Step-By-Step Guidelines on How to Install Linux Operating System
Step 1: Choose and Download a Linux Distribution
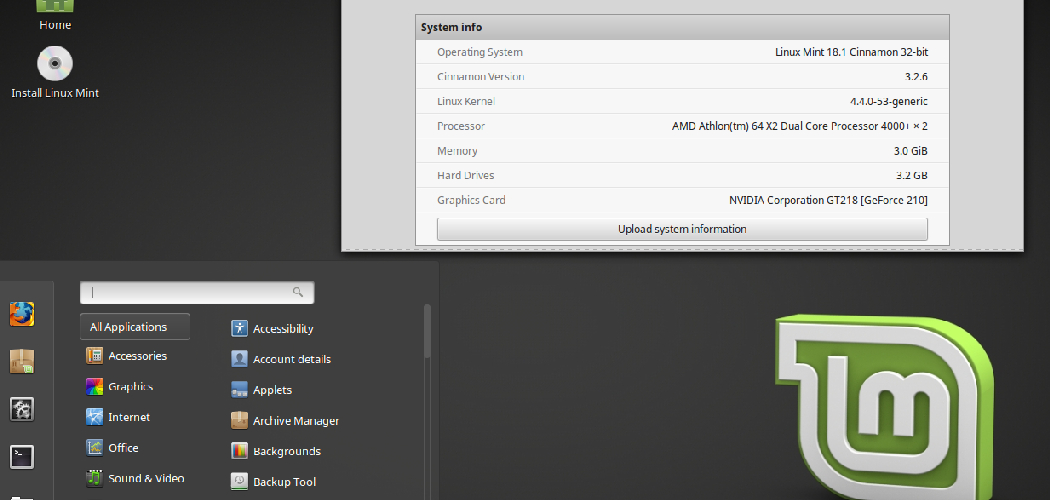
Your first major decision is selecting a Linux distribution, often called a “distro.” Think of a distro as a specific version of Linux, complete with its own desktop environment, pre-installed software, and unique feel. For those new to the ecosystem, user-friendly options like Ubuntu or Linux Mint are highly recommended. Ubuntu is known for its large community and extensive support, making it easy to find help and tutorials. Linux Mint provides a very familiar interface for users coming from Windows, with a classic desktop layout and many multimedia codecs included out of the box.
Once you have decided on a distro, navigate to its official website and find the download section. You will be looking for an ISO file, which is a complete image of the installation disk. Be sure to download the correct version for your computer’s architecture, which for most modern machines will be the 64-bit version (often labeled as x86_64 or amd64). The download will be a large file, typically several gigabytes, so a stable internet connection is crucial. Save the ISO file to a location you can easily access, like your desktop or downloads folder.
Step 2: Create a Bootable USB Drive
With the ISO file downloaded, you now need to create a bootable USB drive. This drive will act as your installation media, allowing you to boot your computer into the Linux installer instead of your current operating system. Download and install a USB creator tool like Rufus or BalenaEtcher. Once installed, open the application and insert your empty USB drive into your computer. The software should automatically detect the USB drive, but always double-check that the correct device is selected to avoid erasing the wrong one.

Next, you will need to select the Linux ISO file you downloaded in the previous step. In the software interface, there will be a button labeled “Select” or “Flash from file.” Click it and navigate to the location where you saved the ISO file. After selecting the ISO, the program will configure the settings automatically. You can typically leave these at their default values. Click the “Start” or “Flash!” button to begin the process. The software will format the USB drive and copy the Linux files onto it, making it bootable. This process may take several minutes to complete.
Step 3: Boot From the USB Drive
After creating the bootable USB drive, the next step is to get your computer to boot from it. To do this, you need to access the Boot Menu or BIOS/UEFI settings of your computer. Start by shutting down the computer you want to install Linux on. Plug the bootable USB drive into one of its USB ports. Now, turn the computer on and immediately begin pressing the key that opens the Boot Menu. This key varies by manufacturer but is commonly F12, F10, F2, or Esc. You may see a brief message on the screen during startup indicating the correct key.
If you successfully open the Boot Menu, you will see a list of bootable devices, including your hard drive and the USB drive. Use the arrow keys to select the USB drive and press Enter. This will start the computer from the Linux installer. If you cannot access the Boot Menu, you may need to enter the BIOS/UEFI setup (often using the Del, F2, or F1 key) and change the boot order priority, moving the USB drive to the top of the list. Save your changes and exit, and the computer should reboot from the USB drive. You will soon be greeted by the Linux distribution’s welcome screen, which usually gives you the option to “Try” or “Install” Linux.
Step 4: Try or Install Linux
When you boot from the USB drive, most modern Linux distributions will present you with a choice: “Try Linux” or “Install Linux.” The “Try” option loads a “live session” of the operating system directly from the USB stick without making any permanent changes to your computer’s hard drive. This is an excellent feature that allows you to explore the desktop, test hardware compatibility, and see if you like the look and feel of the distro. You can connect to Wi-Fi, browse the web, and use the pre-installed applications to get a genuine sense of the user experience.

Once you are comfortable and have confirmed that everything works as expected, you can proceed with the installation. From within the live session, there will usually be an icon on the desktop labeled “Install [Distro Name].” Double-clicking this icon will launch the installation wizard, which will guide you through the rest of the process. The installer will first ask you to select your preferred language and keyboard layout. Ensure these are correct before proceeding to the next steps, where you will configure your system’s partitions and user settings.
Step 5: Configure the Installation
This is the most critical part of the installation process, where you decide how Linux will be installed on your hard drive. The installer will present several options. The simplest choice, often labeled “Erase disk and install Linux,” will wipe your entire hard drive and dedicate it to Linux. This is the best option if you are installing Linux on a new computer or an old one that you don’t need to keep any data from. Remember that this will delete everything, including any existing operating systems like Windows.
A more advanced option is to “Install Linux alongside” your current operating system. If detected, the installer will offer to shrink your existing Windows partition to make space for Linux, setting up a “dual-boot” system. This allows you to choose which operating system to load each time you turn on your computer. For more control, you can choose the “Something else” or “Manual partitioning” option. This is for advanced users who want to create, delete, or resize partitions manually. For beginners, it’s highly recommended to choose either the “Erase disk” or “Install alongside” option to avoid mistakes. After making your choice, the installer will ask you to confirm before it starts writing files to the disk.
Step 6: Finalize the Installation and Reboot
After you have configured the disk partitions, the installer will begin copying the system files to your hard drive. While this is happening in the background, you will be prompted to complete a few final configuration steps. You will need to select your time zone by clicking on a world map to ensure your system clock is set correctly. Following this, you will create your user account. This involves choosing a username and a strong password. This password will be your “administrator” or “root” password, required for installing new software and making system-level changes.
The file copying and installation process can take anywhere from 10 to 30 minutes, depending on the speed of your computer and USB drive. Once it’s finished, you will see a message indicating that the installation is complete. The installer will prompt you to either continue testing the live session or restart the computer to boot into your new Linux system. Choose to restart. When instructed, remove the USB drive from the computer. Your computer will then boot up, and after a few moments, you will be greeted by the login screen of your newly installed Linux operating system. Enter the password you created, and start exploring your new desktop.
Following these steps on how to install linux operating system on your computer will give you a basic understanding of the installation process. However, there are many other factors to consider when installing and setting up a Linux system, such as partitioning, drivers, and software compatibility.
Do You Need To Use Professionals?
For most users, installing Linux does not require professional help. Modern Linux distributions, especially beginner-friendly ones like Ubuntu and Linux Mint, have made the installation process incredibly streamlined and intuitive. The graphical installers guide you through each step, from partitioning your drive to setting up your user account, with clear explanations. The “Try Linux” feature also provides a safety net, allowing you to test everything before committing.
With the abundance of free online tutorials, community forums, and detailed documentation available, most people with a basic level of computer literacy can successfully complete the installation on their own by following a guide like this one.
How Much Will It Cost?
One of the most significant advantages of using Linux is that it is almost always free. The Linux kernel itself is open-source, and the vast majority of distributions are developed by communities and offered at no cost. You can download and install powerful operating systems like Ubuntu, Fedora, Debian, and Linux Mint without spending a dime.
The software required to create the bootable USB drive is also free. The only potential costs are for the physical hardware: a USB drive if you don’t already have one, and of course, the computer itself. This makes Linux an extremely cost-effective solution for everyone, from students to businesses.
Frequently Asked Questions
Q1: Can I Install Linux on Any Computer?
A1: Yes, you can install Linux on almost any computer, including PCs and Macs. Linux is known for its excellent hardware support and its ability to run well on older, less powerful machines. This makes it a perfect choice for reviving an old laptop or desktop that struggles with modern versions of Windows or macOS. However, it’s always a good idea to check the minimum system requirements for the specific distribution you choose. Some niche or very new hardware components might occasionally have compatibility issues, which is why testing with a live session before installing is highly recommended.
Q2: Will Installing Linux Delete My Files?
A2: It depends on the installation option you choose. If you select the “Erase disk and install Linux” option, then yes, all files, programs, and your previous operating system will be completely deleted. This is why creating a backup of your important data is a crucial first step. Alternatively, if you choose to “Install Linux alongside” your existing operating system, the installer will resize your current partitions to make space for Linux without deleting your files. This setup creates a dual-boot system, preserving your old OS and data.
Q3: Which Linux Distribution Is Best for Beginners?
A3: Ubuntu and Linux Mint are widely considered the best choices for beginners. Ubuntu has a massive user community, which means it’s very easy to find help and tutorials for any problem you might encounter. It is well-polished and has a simple, modern interface. Linux Mint offers a desktop experience that is very similar to Windows, making the transition feel more familiar and less intimidating for new users. Both distributions come with a great selection of pre-installed software and are designed to work well right out of the box.
Conclusion
Installing Linux is an accessible and empowering process that opens up a world of freedom, security, and customization for your computer. By following this step-by-step guide on how to install linux operating system, even a complete beginner can successfully replace their current operating system or set up a dual-boot system. The journey from choosing a distribution to booting into your new desktop is straightforward, thanks to the user-friendly tools and helpful communities that surround the Linux ecosystem.
Beyond the installation, you’ll discover the true benefits of Linux: a stable, secure, and highly efficient operating system that gives you complete control. Whether you’re looking to breathe new life into old hardware, learn more about how computers work, or simply want a reliable and free alternative, installing Linux is a rewarding project that will enhance your digital life.