
Video editing is a transformative process that turns raw, disconnected footage into a compelling narrative that captures emotions and tells a story effectively. Whether you are documenting a family vacation or creating a commercial for a brand, the editing phase is where the true magic happens, and Adobe Premiere Pro stands as the industry standard for this craft.

Premiere Pro is robust enough for Hollywood feature films yet accessible enough for beginners who are willing to learn the interface. By mastering this software, you unlock a universe of creative potential, giving you granular control over every frame, sound wave, and color grade in your project. In this guide on how to edit video in premiere pro, we’ll cover the essential tools and techniques you need to know in order to take your video editing skills to the next level.
Tools and Materials You’ll Need
To get started with editing video in Premiere Pro, you’ll need the following tools and materials:
- A computer or laptop capable of running Adobe Premiere Pro
- The latest version of the Adobe Premiere Pro software
- Video footage to edit (can be shot on a camera or downloaded from the internet)
- Any additional audio files, graphics, or elements you want to include in your project
- An external hard drive for storing large video files (optional but recommended)
7 Simple Step-By-Step Guidelines on How to Edit Video in Premiere Pro
Step 1: Launching the Project and Importing Media
The first step in your editing journey involves setting the foundation for your work by launching Premiere Pro and properly importing your assets. When you open the software, you will be greeted by a start screen where you select “New Project,” a critical moment where you must name your file and choose a location on your hard drive to save it. It is highly advisable to save your project file in the same folder structure as your raw video files to keep everything organized. Once the workspace loads, you cannot simply drag files in blindly; you need to use the Media Browser or the Project Panel to ingest your footage.
Organization at this stage is absolutely vital for a smooth workflow later on, especially if you are dealing with dozens or hundreds of clips. Within the Project Panel, you should create “Bins, —which are essentially folders within the software, to categorize your assets into video, audio, sound effects, and music.
By taking the time to label your clips and sort them into their respective bins before you ever touch the timeline, you save yourself hours of searching for specific shots later. Double-click your raw clips to preview them in the Source Monitor, which allows you to view the content without adding it to your final edit yet.
Step 2: Creating a Sequence and Understanding the Workspace
After your media is imported, you must create a sequence, which acts as the canvas where you will paint your video masterpiece. The easiest way to do this is to take your primary video clip—the one that represents the majority of your footage format—and drag it directly onto the “New Item” icon in the Project Panel or onto the empty Timeline area.
This action automatically creates a sequence that perfectly matches the frame rate, resolution, and aspect ratio of your footage, ensuring you don’t run into technical mismatched settings later. You will now see your workspace populate with information across four main quadrants: the Source Monitor (top left), Program Monitor (top right), Project Panel (bottom left), and Timeline (bottom right).

Understanding these panels is the key to navigating Premiere Pro without feeling overwhelmed by the buttons and sliders. The Timeline is where the actual editing occurs; it displays your video and audio tracks horizontally in time. The Program Monitor shows you what is currently on your timeline—essentially, your final product in progress.
As you work, you will likely need to adjust the zoom level of your timeline to make fine cuts or see the big picture. Familiarizing yourself with this layout is essential, and you can even customize the size of these panels to suit your preferences, saving the layout as a custom workspace for future use.
Step 3: The Rough Cut and Assembling Footage
Now begins the actual editing process, often referred to as the “Rough Cut,” where you assemble the skeleton of your story. In this phase, you are not worried about fancy effects or perfect color; your goal is to place the clips in the correct order to establish the narrative flow.
Use the Source Monitor to view your raw clips, and use the “I” key to set an In-point (where the clip starts) and the “O” key to set an Out-point (where the clip ends). Once you have selected the specific portion of the clip you want to use, drag it from the Source Monitor down onto the Timeline. Repeat this process for all your key scenes, laying them out from left to right.
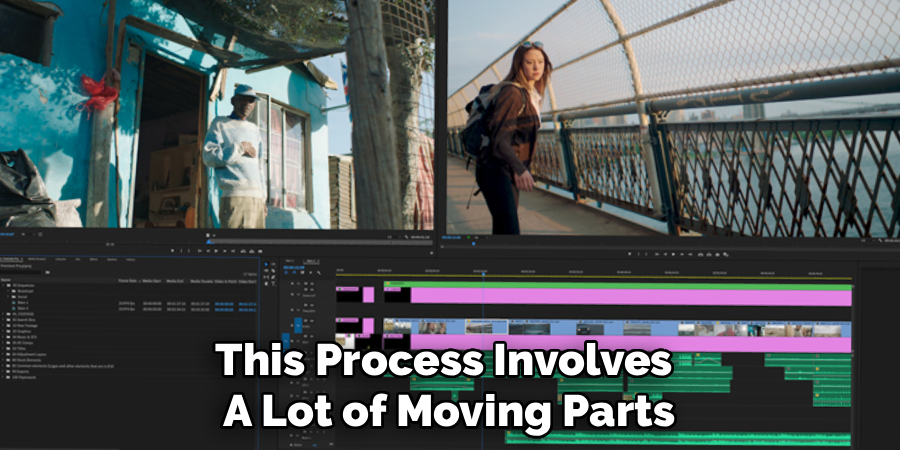
This process involves a lot of moving parts, so learning to use the basic tools in the toolbar is necessary for efficiency. The Selection Tool (shortcut V) allows you to move clips around, while the Razor Tool (shortcut C) lets you slice clips directly on the timeline if you need to remove a section in the middle.
As you build the edit, pay attention to the pacing; leave some breathing room between scenes if necessary, or cut tight for action sequences. Don’t worry if the transitions feel abrupt at this stage; the priority is ensuring the story makes sense logically and that you have included all the necessary visual information to convey your message to the viewer.
Step 4: Refining the Edit with Transitions and Effects
Once your story is assembled, it is time to smooth out the rough edges and add visual flair using transitions and effects. Premiere Pro comes loaded with a library of video transitions, but beginners often make the mistake of using too many flashy ones; usually, a simple cut or a subtle Cross Dissolve is best.
To apply a transition, navigate to the Effects panel, find the “Video Transitions” folder, and drag your chosen transition onto the cut point between two video clips on the timeline. This helps bridge two scenes together seamlessly, indicating a passage of time or a change in location without jarring the audience.
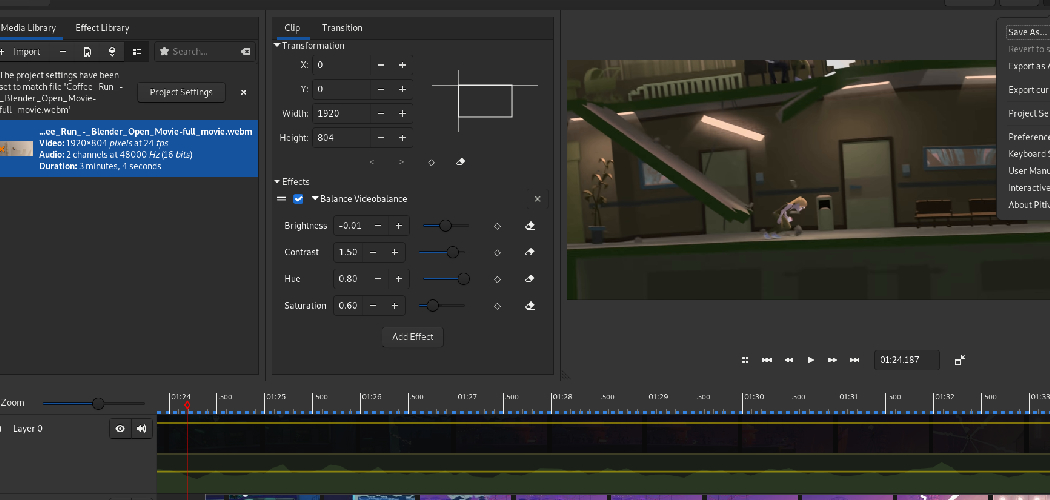
Beyond transitions, you can apply effects to stabilize shaky footage, blur faces, or create stylistic looks. By selecting a clip on the timeline and opening the “Effect Controls” panel (usually located near the Source Monitor), you gain access to parameters like Scale, Position, and Rotation.
This is where you can reframe a shot if the composition wasn’t perfect, or add “Keyframes” to create movement, such as a slow zoom-in during a dramatic moment. Keyframes are powerful tools that tell Premiere Pro to change a setting over time, allowing for dynamic animations that bring static shots to life. Remember that effects render in real-time, so applying too many heavy effects might slow down playback depending on your computer’s power.
Step 5: Audio Mixing and Sound Design
Video is technically 50% audio, but emotionally, audio often carries much more weight, so spending time on your sound mix is non-negotiable. In the timeline, your audio tracks are located below the video tracks; you need to ensure that your dialogue is clear and that background music doesn’t overpower the voices.
You can adjust the volume line on the clip itself by dragging it up or down, or use the “Audio Track Mixer” for more global adjustments. It is crucial to check your audio meters; your sound should generally peak around -6dB to -12dB for dialogue, ensuring it is loud enough to hear but never hitting 0dB, which causes digital distortion or “clipping.”
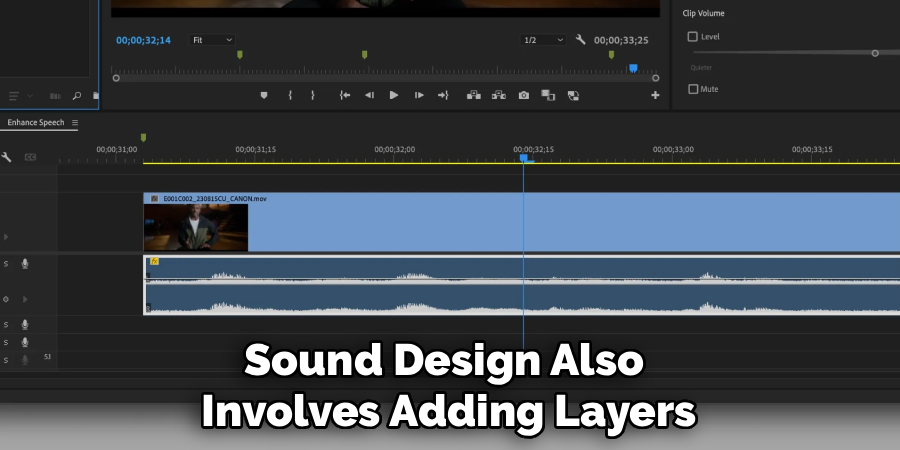
Sound design also involves adding layers to create a rich atmosphere, such as adding sound effects (SFX) like footsteps, traffic noise, or whooshes for transitions. Premiere Pro features an “Essential Sound” panel that simplifies mixing for beginners by allowing you to tag clips as Dialogue, Music, SFX, or Ambience.
Once tagged, the software provides easy sliders to automatically balance volume, reduce background noise, and improve clarity. If you are using a music track, use the “Ducking” feature in the Essential Sound panel to automatically lower the music volume whenever someone is speaking, creating a professional broadcast-style mix without manually drawing volume keyframes.
Step 6: Color Correction and Color Grading
Visually, nothing separates amateur video from professional video quite like proper color correction and grading. Color correction is the process of fixing issues, such as making sure white looks white (White Balance) and that the exposure is correct so details aren’t lost in shadows or highlights. To do this, switch your workspace to the “Color” layout, which opens the powerful Lumetri Color panel on the right side of the screen. Here, you can use the “Basic Correction” tab to adjust temperature, tint, exposure, and contrast to ensure all your clips look consistent with one another.
Once the footage is corrected and balanced, you can move on to color grading, which is the creative part where you apply a “Look” or mood to the video. For instance, you might want a cold, blue tone for a sad scene or a warm, golden hue for a nostalgic memory. The Creative tab in Lumetri Color allows you to apply LUTs (Look Up Tables), which are essentially color presets that instantly transform the aesthetic of your footage. However, be careful not to overdo it; verify your changes using the “Lumetri Scopes” panel to ensure your colors remain within broadcast-safe limits and that skin tones look natural rather than oversaturated or alien.
Step 7: Exporting Your Final Masterpiece
The final step in the process is exporting your project from the timeline into a shareable video file format. Make sure your timeline is active (outlined in blue) and navigate to the “Export” tab at the top left of the interface, or press Ctrl + M (Windows) or Cmd + M (Mac). This opens the Export mode, where you can choose the destination for your file and the format; for most web applications like YouTube, Instagram, or Facebook, the format H.264 is the industry standard because it offers high quality at a manageable file size.
Within the export settings, you will see a variety of presets that can save you time, such as “Match Source – High Bitrate” or specific presets for YouTube 4K or 1080p. While it is tempting to just hit export immediately, take a moment to review the output summary to ensure the frame rate and resolution match your original sequence settings. You can also adjust the target bitrate if you need a smaller file size or higher quality. Once you are satisfied with the settings, click “Export” to render the file immediately, or “Send to Media Encoder” if you want to queue up multiple videos to export while you continue working on other projects.
Following these steps on how to edit video in premiere pro will help you create professional-looking videos with ease. However, there are still many advanced features and techniques that can take your editing skills to the next level.

Safety Tips
When engaging in long video editing sessions, it is easy to neglect your physical health and digital safety, but precautions are necessary. First, prioritize ergonomics by ensuring your monitor is at eye level to prevent neck strain and that your chair supports your lower back adequately. You should follow the “20-20-20 rule” to reduce eye strain: every 20 minutes, look at something 20 feet away for at least 20 seconds. Additionally, video editing puts a heavy load on computer hardware, so ensure your machine has proper ventilation to prevent overheating, which can damage components.
On the digital safety front, data loss is the editor’s worst nightmare, so you must have a robust backup strategy in place before you start. Never keep your only copy of the footage on the computer you are editing on; always have a backup on an external hard drive or cloud storage. Premiere Pro has an “Auto-Save” feature, which you should configure to save every 10 or 15 minutes. However, auto-save is not a replacement for manually saving your project (Ctrl+S) frequently, especially after completing complex tasks or major edits.
Common Mistakes to Avoid
A frequent mistake beginners make is over-editing, where they use too many jump cuts, star-wipe transitions, or loud sound effects that distract from the story rather than enhancing it. Another major pitfall is ignoring audio quality; viewers will forgive grainy video, but they will immediately click away if the audio is distorted or hard to hear. Many new editors also neglect file management, leaving files in their “Downloads” folder rather than moving them to a permanent project drive, resulting in “Media Offline” errors later. Finally, failing to watch the entire video from start to finish before exporting often leads to missed black frames or audio glitches in the final file.
Do You Need To Use Professionals?
Deciding whether to hire a professional video editor or to do it yourself depends largely on the stakes of the project, your budget, and the time you have available to learn the craft. For personal projects, YouTube channels, or internal corporate updates, learning Premiere Pro yourself is incredibly empowering and cost-effective. The software is intuitive enough that you can achieve broadcast-quality results with practice and patience.
However, if you are working on a high-stakes commercial, a feature film, or a project with a strictly immovable deadline, hiring a professional might be necessary. Professionals bring years of experience not just in software usage, but in storytelling pacing, advanced sound design, and color grading that can elevate a project significantly. If your project requires complex motion graphics or VFX that go beyond basic editing, a specialist is usually required. Ultimately, if you have the time, the DIY approach is a rewarding skill to cultivate.
Frequently Asked Questions
Q1: What Are The Minimum System Requirements To Run Premiere Pro Smoothly?
To run Adobe Premiere Pro effectively without constant lagging or crashing, your computer needs to meet specific hardware benchmarks. At a minimum, Adobe recommends a multicore processor with 64-bit support (Intel 6th Gen or newer, or AMD Ryzen 1000 Series or newer) and the latest operating system (Windows 10/11 or macOS). You will need at least 8GB of RAM, though 16GB is highly recommended for HD media and 32GB for 4K. A dedicated GPU with at least 2GB of VRAM is also essential for rendering effects and playback performance.
Q2: Why Is My Video Lagging Or “Choppy” While I Am Trying To Edit?
Playback lag is a very common issue in Premiere Pro, usually caused by your computer struggling to process high-resolution footage in real-time. This often happens if you are editing highly compressed codecs like H.264 or H.265 directly, which are hard for the CPU to decode on the fly. To fix this, you can lower the “Playback Resolution” in the Program Monitor to 1/2 or 1/4 quality, which reduces the strain on your system without affecting the final export quality. Alternatively, you can create “Proxies,” which are low-resolution copies of your files used for editing that automatically swap back to the high-quality originals when you export.
Q3: Can I Open A Premiere Pro Project On An Older Version Of The Software?
Generally, Adobe Premiere Pro is not backward compatible, meaning you cannot open a project file created in the 2024 version on the 2023 software. The project file structure changes with updates, and trying to open a newer file on an older system will result in an error message stating the project is damaged or outdated. However, there is a workaround involving exporting your project as an XML file or “Final Cut Pro XML” from the newer version, which can sometimes be imported into older versions, though you may lose some specific effects or transitions in the translation process.
Conclusion
Mastering Adobe Premiere Pro is a journey that begins with understanding the basics of the interface and evolves into a lifelong pursuit of creative storytelling. By following these seven steps on how to edit video in premiere pro—from organized importing and rough cutting to refined audio mixing and color grading—you can transform raw footage into professional-grade videos.
While the software may seem complex initially, breaking the process down into manageable stages makes it entirely approachable. Remember to prioritize safety, back up your work, and avoid common pitfalls like poor audio. With practice, you will gain the confidence to edit any project, unlocking the ability to share your unique vision with the world.