

Have you ever wanted to run another operating system inside your current one, test new software in a safe sandbox environment, or use an Android emulator to play mobile games on your PC? The technology that makes all of this possible is called virtualization. It allows your computer to create and manage virtual machines (VMs), which are essentially digital versions of a physical computer.

However, for this to work efficiently, your computer’s processor needs a specific feature enabled at its most fundamental level. This setting is often disabled by default for security reasons. Learning how to turn on virtualization in bios is the key to unlocking this powerful capability. This guide will demystify the process, providing a clear, step-by-step walkthrough that even a complete beginner can follow to safely enable this feature and get their virtual environments up and running.
Virtualization is the process of creating a virtual, or software-based, version of a device, operating system, storage system or network. It allows you to run multiple operating systems and applications on a single physical computer simultaneously. This technology has become increasingly popular with the rise of cloud computing and the need for efficient use of resources.
Why is Virtualization Disabled by Default?
One reason for this is security. By disabling virtualization in BIOS, it becomes more difficult for malicious software or hackers to exploit virtual machines on a computer. This is because without virtualization, the operating system has more control over hardware resources and can prevent unauthorized access.
Another reason is compatibility. Some older computers may not support virtualization technology or may have limited resources that cannot handle running multiple operating systems at once. Disabling virtualization ensures that the computer runs smoothly for users who do not need this functionality.
7 Step-by-Step Guide on How to Turn On Virtualization in BIOS
Step 1: Check If Virtualization Is Already Enabled
Before diving into your computer’s core settings, you should first check if virtualization is already active. On Windows, this is a simple process. Open the Task Manager by pressing Ctrl + Shift + Esc. Navigate to the “Performance” tab and select “CPU.”
On the right-hand side, look for a line item labeled “Virtualization.” If it says “Enabled,” you are all set and no further action is needed. If it says “Disabled,” you will need to proceed with the next steps. This quick check saves you from an unnecessary trip into the BIOS and confirms that your processor supports the feature, as it would not be listed otherwise.
Step 2: Accessing the BIOS or UEFI Menu
The BIOS (Basic Input/Output System) or its modern equivalent, UEFI (Unified Extensible Firmware Interface), is the firmware that initializes your hardware during the boot process. To access it, you must restart your computer and press a specific key just as it begins to power on. The correct key varies by manufacturer but is commonly F2, F10, F12, or Delete.
This key is often displayed briefly on the screen during startup. If you miss the window, simply restart and try again. On modern Windows systems, you can also access UEFI by navigating to Settings > Update & Security > Recovery > Advanced startup, and then clicking “Restart now.”
Step 3: Find the Advanced CPU Configuration Menu
Once you are inside the BIOS/UEFI interface, you will be met with a menu that looks very different from your normal operating system. The layout and terminology can vary significantly between manufacturers like Dell, HP, ASUS, or MSI. You need to navigate to the section that contains processor settings.
Look for menu tabs labeled “Advanced,” “CPU Configuration,” “System Configuration,” or “Security.” Use the arrow keys on your keyboard to move between sections. Be patient and explore the different tabs until you find the one that deals specifically with your CPU’s features and settings.
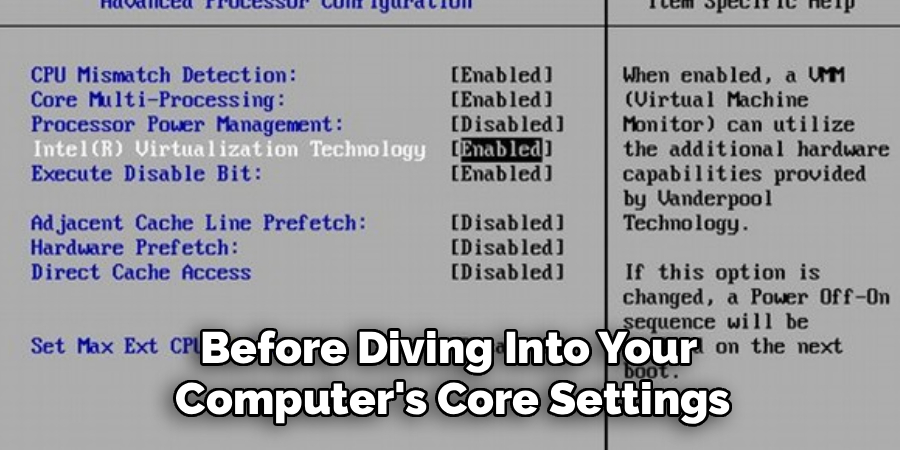
Step 4: Locate the Virtualization Setting
Within the advanced CPU settings menu, you will need to find the specific option for virtualization technology. The name for this feature differs between Intel and AMD processors. For Intel CPUs, the setting is typically called “Intel Virtualization Technology,” “Intel VT-x,” or simply “Virtualization.”

For AMD CPUs, look for “AMD-V,” “SVM Mode” (Secure Virtual Machine), or “Virtualization Extensions.” This option will likely be set to “Disabled.” This is the critical toggle you need to change. This part of learning how to turn on virtualization in bios requires careful reading of the on-screen options to ensure you are selecting the correct one.
Step 5: Enable the Virtualization Feature
Once you have located the correct setting, you will need to change its value from “Disabled” to “Enabled.” Typically, you can do this by highlighting the option with your arrow keys and pressing the Enter key. This will usually bring up a small submenu where you can select the “Enabled” option.
In some BIOS interfaces, you might use the Plus (+) or Minus (-) keys to toggle the setting directly. The on-screen key legend will tell you how to modify values. After you have switched the setting to “Enabled,” you have successfully completed the main task. Do not exit the BIOS just yet, as your changes have not been saved.
Step 6: Save Changes and Exit
Your work is not finished until you save the new configuration. If you exit without saving, the virtualization setting will revert to “Disabled” on the next boot. Look for an option labeled “Save & Exit,” “Exit & Save Changes,” or something similar. This is usually the last tab in the menu or a function key command listed at the bottom of the screen (often F10).

Selecting this option will prompt a confirmation dialogue box asking if you are sure you want to save the changes. Select “Yes” or “OK.” The computer will then save the new BIOS settings and automatically restart.
Step 7: Verify Virtualization Is Enabled in Windows
After your computer has rebooted and you are back in your operating system, it is time to confirm that your changes took effect. As you did in the first step, open the Task Manager by pressing Ctrl + Shift + Esc. Go back to the “Performance” tab and click on the “CPU” section. Look again at the “Virtualization” entry on the right side of the window.
It should now display “Enabled.” If it does, you have successfully completed the process. You are now ready to install and run virtual machine software like VirtualBox, VMware, or use features like the Windows Subsystem for Android.
Frequently Asked Questions
Is It Safe to Turn On Virtualization?
Yes, for the vast majority of personal computer users, enabling virtualization is perfectly safe. The feature is often disabled by default as a precautionary security measure in enterprise environments to prevent certain types of malware.
For home use, such as gaming with emulators or running virtual machines for software development, the benefits far outweigh the minimal risk. Modern operating systems and hypervisors have robust security features to isolate virtual environments.
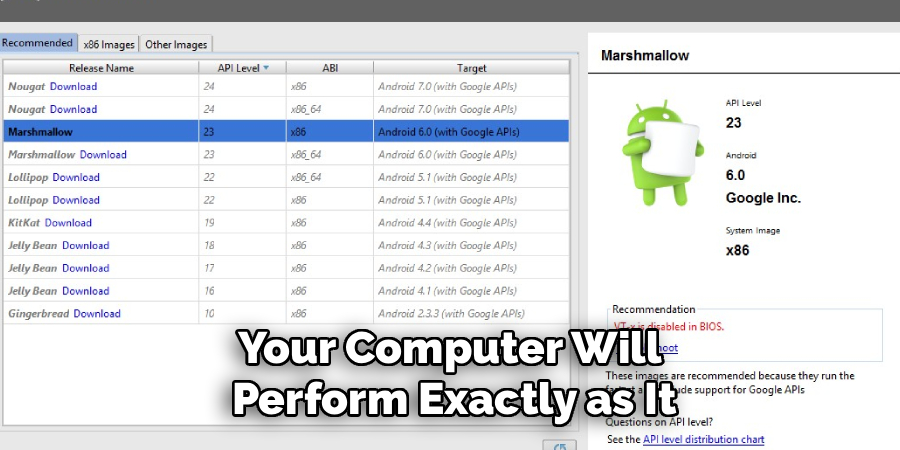
Will Enabling Virtualization Slow Down My Computer?
No, simply enabling virtualization in the BIOS will not slow down your computer’s day-to-day performance. The feature remains dormant until it is actively used by a program that requires it, such as a virtual machine or an emulator. When you are not running virtualization-based software, your computer will perform exactly as it did before. The feature does not consume any system resources when it is idle.
What Is the Difference Between Intel VT-x and AMD-V?
Intel VT-x (Virtualization Technology) and AMD-V (AMD Virtualization) are the brand names for the hardware-assisted virtualization capabilities built into Intel and AMD processors, respectively. They both serve the exact same purpose: to provide the necessary hardware hooks for software to run virtual machines efficiently. While the underlying technology is different, the end result for the user is the same. The only practical difference is the name you will look for in your BIOS menu.
My BIOS Looks Different. How Do I Find the Setting?
BIOS/UEFI interfaces vary widely. If you are struggling, the best course of action is to search online for your specific computer or motherboard model plus the phrase “enable virtualization.” For example, “Dell XPS 15 enable VT-x” or “ASUS ROG Strix B550 enable SVM.” This will often lead you to a video or a forum post with precise instructions and screenshots for your exact hardware, guiding you directly to the correct menu and option.
Can I Enable Virtualization Without Accessing the BIOS?
No, hardware virtualization is a core processor feature that can only be toggled on or off from the BIOS/UEFI firmware menu. There is no software-level command or setting within Windows, macOS, or Linux that can enable it. Accessing the BIOS is a mandatory step. This ensures that such a fundamental hardware setting cannot be changed maliciously by a virus or a background application without the user’s direct intervention during the boot process.
Conclusion
Venturing into your computer’s BIOS might seem daunting at first, but it is a straightforward process when you follow a clear plan. By confirming your current status, accessing the BIOS correctly, navigating to the CPU settings, and enabling the right feature, you unlock a new world of computing possibilities.
The ability to run virtual machines opens the door to safer software testing, cross-platform development, and enhanced gaming. The key is to work methodically and save your changes before exiting. Now that you have a comprehensive guide on how to turn on virtualization in bios, you can confidently enable this feature and start exploring the powerful and flexible world of virtual computing.
About
Josh Stone is a distinguished figure in the world of software engineering and digital architecture, with a decade of expertise creating innovative and scalable software solutions. His professional focus lies in merging legacy system stability with modern agile development, fostering applications that are both high-performing and user-centric. As an authoritative voice in the tech space, Josh Stone delves into the art and science of clean code and systems design, inspiring developers and industry leaders alike.
Education
RMIT University (Melbourne, Australia) Associate Degree in Software Development Focus on sustainable codebases, industry-driven projects, and practical programming. Gained hands-on experience with full-stack frameworks, database management, and cloud infrastructure.
Nottingham Trent University (United Kingdom) Bachelor’s in Computer Science and Systems Design (Honors) Specialized in software architecture with a focus on blending creative UI/UX with robust backend production techniques. Participated in high-level industry projects, collaborating with global tech firms to gain real-world insights into enterprise-level deployment.
Publications and Impact
In his technical writings, Josh Stone shares his insights on agile design processes, emerging languages, and strategies for efficient DevOps. His work bridges the gap between theoretical computer science and modern industry needs, making it a must-read for both budding programmers and seasoned software architects.